Orangedale

Nestled in the heart of Cape Breton, the quaint village of Orangedale unfolds like a hidden gem, with its charm amplified by the rhythmic echoes of its past—the Orangedale Railway Museum. This picturesque corner of Nova Scotia, surrounded by rolling hills and overlooking the shimmering waters of the Bras d’Or Lake, encapsulates the essence of maritime history.

Support Sonas as Onshore Crew! Any amount of support helps the Sonas project.
Help out with Patreon Support

The Orangedale Railway Museum, a testament to a bygone era, beckons visitors with the allure of vintage locomotives and tales woven into the fabric of the village. As you step onto the well-preserved grounds, the ambiance transports you to the days when the rhythmic chug of steam engines filled the air.

In the heart of the museum stands a meticulously restored train station, a relic from the days when railroads were the lifelines of communities. Weathered wooden benches tell stories of passengers eagerly awaiting their journeys, and the ticket window whispers tales of destinations long past. The museum doesn’t merely showcase artifacts; it invites visitors to embark on a nostalgic voyage.

One can’t help but be captivated by the centrepiece—a magnificent steam locomotive proudly standing as a sentinel to history. Its imposing presence is a tribute to the men and women who once fueled the fires and steered these iron beasts across the rugged landscapes of Cape Breton.

Wandering through the museum, you’ll discover a trove of railway memorabilia—vintage uniforms, time-worn tools, and faded photographs that chronicle the railway’s role in shaping the region. The exhibit isn’t just a collection; it’s a living testament to the resilience and determination of the communities that relied on the railway for connection and commerce.

The stories whispered within the museum’s walls resonate with the spirit of Orangedale—a village that embraces its past while embracing the present. Beyond the artifacts, the railway museum serves as a community hub, hosting events that bring locals and visitors together to celebrate their shared heritage.

As the sun sets over the Bras d’Or Lake, casting a warm glow on the museum grounds, you leave Orangedale with a sense of having experienced more than history. You’ve touched the heart of a community that cherishes its roots, and in the echo of distant train whistles, you’ve heard the timeless melodies of a bygone era that still resonate through the hills and waters of Cape Breton.

Springtime Preparation

Preparing Your Sailboat for Launch: A Comprehensive 20-Item Checklist
The list of To-Dos grows as does the mess of parts and sailing paraphernalia sitting on the office floor.  Fuel filters, oil filters, electrical bits, bights of rope, radio batteries chartplotter cords, etc. Somehow it will all come together! 

Preparing Your Sailboat for Launch: A Comprehensive 20-Item Checklist

Launching your sailboat into the water is an exciting moment, but proper preparation is key to ensure a smooth and safe transition. Here’s a detailed checklist to guide you through the essential tasks:

  1. Inspect the Hull:
    • Check for any cracks, blisters, or damage on the hull.
    • Ensure the bottom paint is in good condition for anti-fouling.
  2. Check the Keel:
    • Inspect the keel for any signs of damage or wear.
    • Ensure keel bolts are secure.
  3. Inspect the Rudder:
    • Check the rudder and fittings for any damage.
    • Verify that the steering system is functioning properly.
  4. Examine the Rigging:
    • Inspect all standing and running rigging for wear, corrosion, or damage.
    • Check turnbuckles and clevis pins for tightness.
  5. Check the Mast:
    • Inspect the mast for any signs of corrosion, cracks, or damage.
    • Verify that all masthead equipment is secure and functioning.
  6. Inspect Sails:
    • Unfurl and inspect sails for tears, mildew, or other damage.
    • Check sail attachments and reefing points.
  7. Examine the Deck Hardware:
    • Inspect all deck hardware, including winches, cleats, and blocks.
    • Lubricate moving parts and ensure proper function.
  8. Check Safety Equipment:
    • Ensure that life jackets, flares, and other safety equipment are on board and in good condition.
    • Test and recharge fire extinguishers if necessary.
  9. Inspect Electronics:
    • Check the functionality of navigation instruments, GPS, and communication devices.
    • Ensure the battery for electronic equipment is charged.
  10. Verify Plumbing Systems:
    • Check all through-hulls and seacocks for leaks or corrosion.
    • Test the bilge pump to ensure it’s functioning properly.
  11. Inspect Engine and Fuel System:
    • Check the engine oil, coolant, and fuel levels.
    • Test the engine to ensure it starts smoothly and runs properly.
  12. Check Electrical Systems:
    • Inspect wiring for any fraying or corrosion.
    • Test all lights, including navigation lights and interior lights.
  13. Verify Steering System:
    • Check the functionality of the wheel or tiller.
    • Ensure that the emergency tiller is accessible.
  14. Inspect Anchoring Equipment:
    • Check the anchor, chain, and rode for any signs of wear or corrosion.
    • Verify that the windlass or manual winch is functioning.
  15. Check Docking Equipment:
    • Inspect fenders for leaks or damage.
    • Ensure dock lines are in good condition and have proper lengths.
  16. Verify Communication Equipment:
    • Check the VHF radio for proper function and signal clarity.
    • Ensure you have a working whistle or horn for signaling.
  17. Prepare for Mast Stepping:
    • If the mast was unstepped for storage, ensure all necessary equipment for stepping is on hand.
    • Check mast partners and step for proper alignment.
  18. Commission the Engine:
    • If the engine was winterized, follow the proper steps to commission it for use.
    • Check the transmission, throttle, and shift controls.
  19. Load Provisions and Personal Items:
    • Ensure you have all necessary provisions, including food, water, and safety gear.
    • Load personal items and check cabin spaces for organization.
  20. Perform a Float Test:
    • Prior to launching, perform a float test by filling the bilge with water to check for leaks.
    • Confirm that the bilge pump effectively removes water.

By following this comprehensive checklist, you’ll not only ensure the safety and seaworthiness of your sailboat but also enhance the enjoyment of your sailing experience. Safe travels and fair winds!

Summer ends 2022

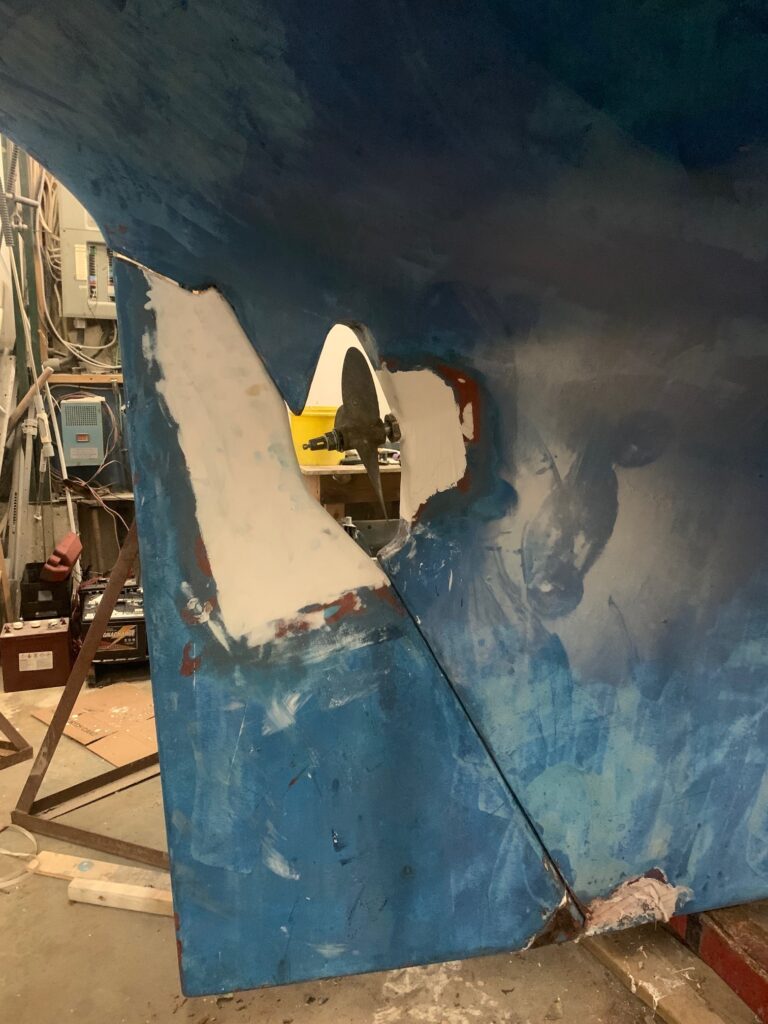
After the interesting situation of no propulsion given the separation of the transmission and the propeller flanges, we sailing Sonas out of Maskells bay to Baddeck Marine. Sailing into a crowded harbour with no engine is not without some stress, but we wheeled her into the wind at almost the correct mooring buoy. The issue was critical and we had to haul out and this ended any summer plans.

Sunny Ride

Stern Cockpit

Summer Sonas – Video

Sailing Sonas (Douglas 32) on Bras d’Or Lake (Mi’kmawi’simk: Pitupaq) is an experience like no other. This lake is an irregular estuary located in the centre of Cape Breton Island in Nova Scotia, Canada. It is connected to the open sea and is affected by the tide. Additionally, fresh water flows into the lake from rivers, making the brackish water a very productive and diverse habitat. This unique environment was recognized by UNESCO in 2011 when it designated Bras d’Or Lake Biosphere Reserve.

Sailing Sonas on this lake provides an opportunity to experience the beauty and natural diversity of the area. The lake is surrounded by lush forests, rolling hills, and sandy beaches. Wildlife of all kinds can be seen along the shoreline, including osprey, bald eagles, and various species of waterfowl. The lake is also home to a variety of fish and other marine mammals, such as porpoises and seals.

Orangedale

Orangedale is a rural community in Nova Scotia steeped in history. Founded by Orangemen in the Denys Basin of Cape Breton Island’s Bras d’Or Lake, the community was originally a collection of small farming and fishing operations. In 1886, the construction of the Intercolonial Railway of Canada mainline from Sydney to Point Tupper changed the community forever. The railway line brought a new era of economic growth and development, and Orangedale was transformed into a Victorian-period two-storey railway station. The station and its surrounding grounds included a post office, a telegraph office, an express office, and a store. The station also included a freight shed and a large yard complete with a turntable and a roundhouse. With the railway line, Orangedale became a hub for transportation, communication, and commerce.

For decades, the Intercolonial Railway (ICR) connected the town to the rest of mainland Canada. In 1918, the ICR became part of the Canadian National Railways, and in 1993, CN sold the line to the Cape Breton and Central Nova Scotia Railway.

Unfortunately, passenger rail service ceased in the area the 1990 by Via Rail Canada. Despite this, the community of Sydney still maintains a strong connection to the railway industry, and its history has been preserved throughout the years.

Mast Step – Douglas 32

A mast step is a crucial component of a sailboat that serves as the base or support structure for the mast. It plays a pivotal role in distributing the loads and forces generated by the mast, ensuring stability and structural integrity. The mast step is located at the base of the mast and connects it to the boat’s structure, typically the keel or the deck.

In sailboat design, the choice between a keel-stepped mast and a deck-stepped mast involves considerations of functionality, performance, and ease of maintenance.

A keel-stepped mast is secured directly to the boat’s keel, extending down through the deck and resting on the keel structure. This configuration provides robust support, transferring the considerable forces generated by the mast and rigging directly into the boat’s keel. Keel-stepped masts are often favored in larger sailboats and offshore cruisers for their inherent strength and stability. Additionally, they allow for a lower center of gravity, contributing to the boat’s overall stability.

On the other hand, the Douglas 32 deck-stepped mast is secured to the deck of the sailboat, with the base resting on a reinforced section of the deck structure. This design is often found in smaller boats, especially those designed for ease of handling and simplicity. Deck-stepped masts are lighter and easier to step and unstep, making them popular in trailerable sailboats and smaller cruising vessels. While they may not offer the same level of structural strength as keel-stepped masts, they are suitable for a range of sailing conditions, particularly in coastal and inland waters.

Both keel-stepped and deck-stepped masts have their advantages and are chosen based on the intended use and design preferences of the sailboat. The mast step, regardless of type, remains a critical element in maintaining the overall stability and performance of the sailboat, ensuring a safe and enjoyable sailing experience.

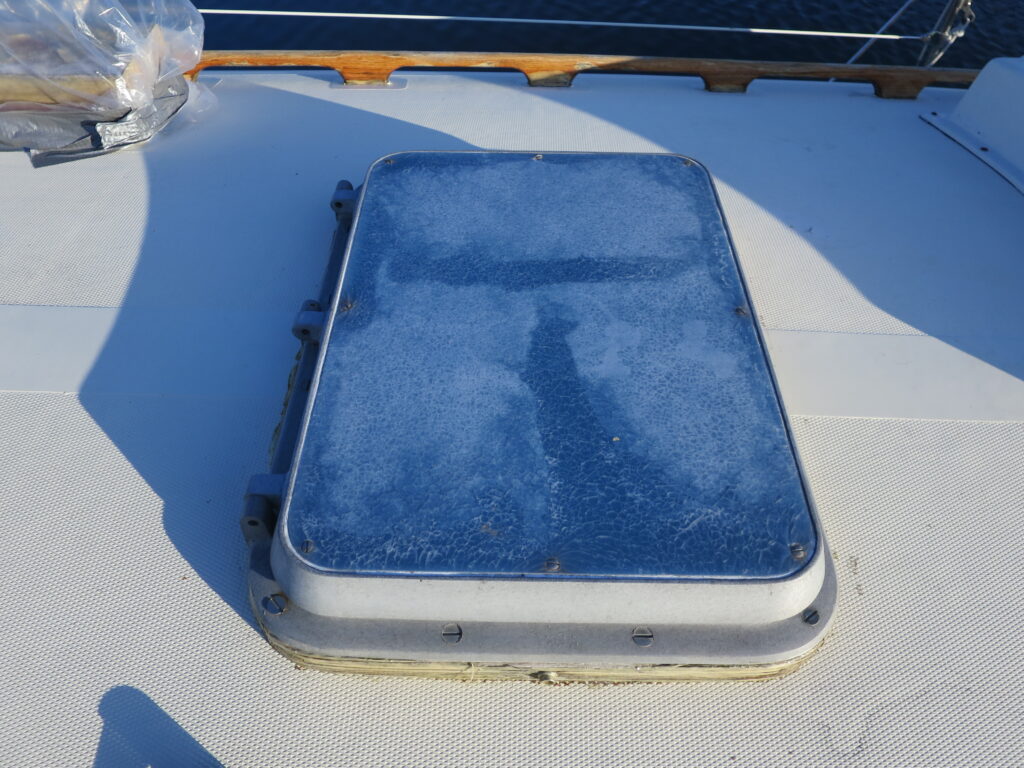
Deck Hatch

cabin Hatch

Securing a deck hatch on a sailboat is essential for both safety and preventing water ingress. Deck hatches, typically located on the cabin roof, provide access to the interior and often house important compartments. Here are key steps to properly secure a deck hatch:

  1. Inspect the Gasket: Before closing the hatch, inspect the gasket for any signs of wear, damage, or deterioration. The gasket ensures a watertight seal, and a well-maintained gasket is crucial for keeping water out.
  2. Clean the Sealing Surfaces: Ensure that both the mating surfaces of the hatch and the deck are clean and free from debris. Any dirt or grime can compromise the effectiveness of the seal.
  3. Align and Center: When closing the hatch, align it properly with the opening and center it to ensure an even seal around the edges. Misalignment may lead to gaps where water can penetrate.
  4. Engage the Latches or Locks: Most deck hatches are equipped with latches or locks. Engage these mechanisms securely to hold the hatch in place. Some hatches may have multiple locking points for added security.
  5. Tighten Fasteners: If the hatch is secured with fasteners, such as screws or bolts, make sure they are tightened appropriately. Avoid over-tightening, as it may damage the hatch or compromise the seal.
  6. Apply Lubrication: Periodically lubricate moving parts, such as hinges and latches, to ensure they operate smoothly. This helps in maintaining the integrity of the sealing mechanism.
  7. Use Safety Lines: In rough sea conditions, consider using safety lines or straps to provide an additional layer of security. This prevents accidental opening due to heavy waves or impact.

Regular maintenance and attention to detail when securing a deck hatch contribute to the overall seaworthiness of the sailboat, preventing leaks and ensuring a safe and dry interior.

Bow – Pulpit and Anchor

The pulpit of a sailboat, located at its bow, is a critical component that marries form with function, serving as both a protective barrier and an elegant embellishment. Typically constructed from durable materials such as stainless steel or aluminum, the pulpit is designed with meticulous precision to ensure the safety of sailors navigating the open waters.

Functionally, the pulpit creates a secure perimeter to prevent accidental falls overboard. It extends along the sides of the bow, often connected to stanchions and equipped with lifelines or netting to establish a protective enclosure. This feature becomes especially crucial during rough seas or adverse weather conditions, providing a reliable buffer against the powerful forces of the ocean.

Additionally, the pulpit often hosts essential navigation equipment. Integrated navigation lights, for instance, ensure the sailboat remains visible in low-light conditions, contributing to overall maritime safety. In some cases, the pulpit may support a bowsprit, a protruding spar that enhances the boat’s sailing capabilities by providing a point of attachment for additional sails.